Quality & Inspection

Altek’s Quality Policy
“Altek is committed to providing customer satisfaction through open communications and continuous improvement.”
Paste Inspection
Inline paste inspection machines on our SMT lines identify defects in the paste deposits before a single component is applied. Proper paste application eliminates a significant portion of quality defects facilitating Altek’s 98% quality acceptance rate. Controlling and monitoring paste application increases long-term solder joint reliability. This important step ensures quality by detecting defects in the earliest possible stage of the manufacturing process, saving costly rework and scrap.
Automated Optical Inspection (AOI)
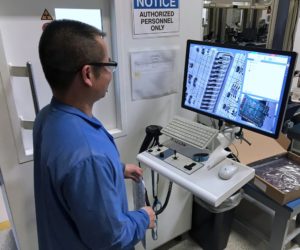
Incorporating AOI inspection in our surface mount lines ensures a high level of quality in Altek’s surface mount assembly process. PCB inspection is made efficient, repeatable and accurate with the use of our in-line Mirtec MV-7U – 3D AOI units. Five different camera angles inspect your PCB Assemblies for part presence, polarity, skew and various other placement and soldering defects.
Mirtec MV-7U
- High speed 15 Mega pixel (@15 um per pixel) downward camera with a Telecentric compound lens (capable of 120 fps)
- Digital Multi-Frequency Quad Moiré Technology
- Height accuracy of ±3 um
- Four 10 Mega pixel side-view cameras
- Advanced 8 phase color lighting system
- 45mm part clearance 50 mm x 50mm to 660mm x 510mm PCB capacity
- SPC Data collection
- Simple and quick programming (better accommodates prototype PCB runs)
Using Mirtec desktop MV-2HTL AOI’s machines allow for Quick turn prototypes and complex high mix assembly inspection.
Mirtec desktop MV-2HTL
- 10 Mega pixel downward camera with a telecentric compound lens
- Four 5 Mega pixel side-view cameras
- Intelli-Scan Laser inspection (lifted lead and BGA/QFN co-planarity check)
- 45mm part clearance (same for MV2-HTL)
- 50 mm x 50mm to 660mm x 510mm PCB capacity
- SPC Data collection
- Simple and quick programming (better accommodates prototype PCB runs)
This flexible configuration of equipment allows us to seamlessly handle AOI inspection from prototyping circuit boards to production runs.
See our facilities list for a full scope of our equipment and min/max board sizes.

X-ray Inspection
X-Ray inspection offers reliable quality inspection for PCBA assemblies. The Yxlon Y. Cougar provides the ability to verify bonding areas, solder joints and measure voids as well as other anomalies like non-wetted solder balls. X-Ray inspection capability is critical for many types of surface mount assemblies, especially those that include BGA’s, QFN’s and other array devices. X-ray inspection is also used to evaluate Through-hole solder joints, eliminating the need for destructive testing.

X-Ray SMD Parts Counter
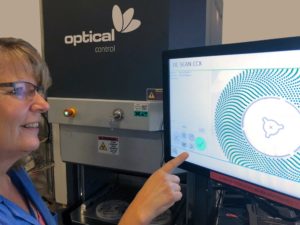
Managing Inventory on Altek’s OC SCAN CCX.3 reel counter helps provides 99.9% accuracy and performs inventory validation in seconds for efficient and accurate inventory control.
Visual Inspection
Manual Visual Inspection (MVI) is used throughout our production cycle.
- Inspection of part upon receipt at incoming inspection
- Visual inspection at kitting
- SMT and After Wave Inspection
- Hand Solder Inspection
- Pre-shipping inspection
We continually review our process and make adjustments to meet our customer’s needs as part of our continuous improvement program.
